


Key Takeaways:
- The skeg enhances directional stability and protects the propeller and rudder from underwater hazards.
- Examine for cracks, bends, or missing pieces to determine if repair or replacement is needed for proper functionality and safety.
- Clean the damaged area, remove debris, and follow specific steps for welding or using epoxy adhesive to restore the skeg.
- Install a skeg guard, which protects the skeg from future damage. Proper installation involves cleaning the area, aligning the guard, and securing it with bolts and seals.
Repairing a skeg on a boat might seem like an insurmountable task, but with the right guidance, you can tackle it successfully. Imagine the satisfaction of getting your boat back in top shape and gliding smoothly through the water.
However, before you can enjoy that moment, there are crucial steps to follow to ensure a proper repair. Let’s begin by assessing the damage and understanding what needs to be done to restore your boat’s performance.
The Definition of a Boat Skeg
Let’s first discuss what is a boat skeg. A boat skeg is one of the vital parts of a motor boat, fin-like protection for the boat motor and is located on the underside of the boat’s hull, extending downwards toward the stern.
It serves multiple purposes: it enhances directional stability by acting as a physical barrier against sideways movement, thus helping the boat maintain a straight path through the water.
Additionally, the skeg protects the propeller and rudder from underwater hazards, reducing the risk of damage when navigating shallow or debris-filled waters. In some designs, the skeg also contributes to the hydrodynamic efficiency of the boat, improving handling and performance during navigation.
Assessing the Damage
When inspecting a damaged skeg on your boat, carefully examine the extent of the breakage and any potential underlying issues that may have caused it. A broken skeg not only affects the aesthetics of your boat but also compromises its functionality and safety. Start by assessing the damage to determine whether a repair is feasible or if a replacement is necessary. Look for cracks, bends, or missing pieces in the skeg, as well as any damage to the propeller or outboard motor caused by the broken skeg.
To fix a damaged skeg, you may need to weld the broken parts back together or reinforce it with additional aluminum for protection. Consider the impact on steering and ensure that the repair restores proper functionality. Pay attention to any signs of wear and tear that may have contributed to the damage, such as improper maintenance or hitting underwater obstacles. By addressing the issue promptly, you can prevent further damage and enjoy smooth sailing on your boat.

Gathering Necessary Tools and Materials
To prepare for repairing a skeg on a boat, gather the necessary tools and materials to ensure a smooth and efficient process. When dealing with minor damage to the skeg, the first step is to assemble the required items. You’ll need welding aluminum equipment to effectively mend the broken skeg. Make sure to have a welder handy, as welding is crucial in restoring the skeg to its original state. Additionally, protect the lower unit of the boat while working on the skeg repair to prevent any potential damage to the motor.
While you’re on the skeg maintenance, you can also use the chance to convert your outboard motor with some of our kits.
Ensure you have all the tools within reach before beginning the repair. A prop wrench might be necessary for removing the prop, depending on the repair process. By having all the materials and tools ready, you can streamline the repair of the broken skeg efficiently. Once you have gathered everything you need, you’ll be better equipped to tackle the repair task at hand.
Even if you need just one replacement part instead of whole kits, Bay MFG offers individual parts for sale.
cta_section
Preparing the Skeg for Repair
Before you can begin repairing the skeg on your boat, the initial step involves preparing the damaged area for the repair process. Inspect the skeg thoroughly for any signs of corrosion or damage caused by running aground, as these issues can affect the directional stability of your vessel. If the damage is extensive or the skeg is severely corroded, consider replacing it entirely. However, if the damage is minor, you may be able to repair it using welding or epoxy adhesive.
Start by cleaning the surface around the damaged area to ensure proper adhesion of the repair materials. Remove any peeling paint, rust, or debris using a wire brush or sandpaper. Once the surface is clean and dry, you can begin the repair process. If you’re using epoxy adhesive, carefully follow the manufacturer’s instructions for mixing and applying the adhesive to the damaged area. For welding repairs, make sure to grind down the damaged area to create a smooth surface for welding.
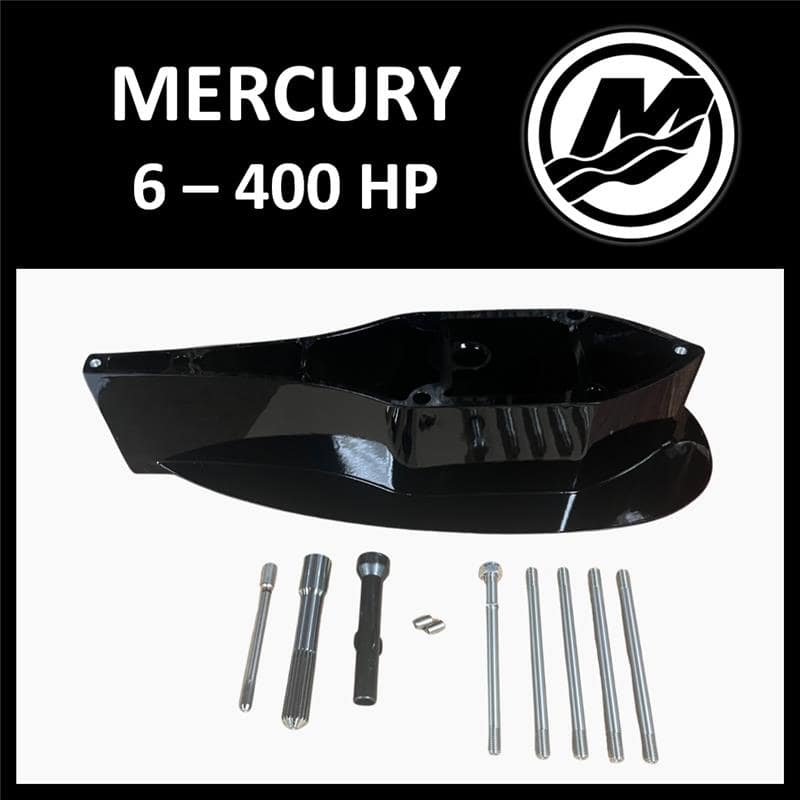
Installing the Skeg Guard
Consider incorporating a protective skeg guard to shield your boat’s skeg from future damage. Installing a skeg guard is a practical way of protecting the fin of your boat from potential harm.
To begin the installation process, make sure the area around the skeg is clean and free of any debris. Position the skeg guard over the skeg, ensuring that it aligns properly with the existing skeg shape. Secure the guard in place by using the provided bolts and seals. Tighten the bolts securely but be careful not to over-tighten them, as this could damage the seals or the guard itself.
If you’re unsure about the installation process, it’s recommended to seek professional service to ensure the skeg guard is properly installed and provides the necessary protection for your boat’s skeg.
Once the skeg guard is securely in place, you can rest assured that your boat’s skeg is well-protected from potential damage while out on the water.
Given that we have been in the business for four generations, and have raving reviews that attest to that, you can rest assured that our crew has the right experience to advise you.

Final Steps and Testing
Once the skeg guard is securely in place, proceed with the final steps by conducting thorough testing to ensure its effectiveness in protecting your boat’s skeg. Start by checking the bearings to ensure they’re in good condition and properly aligned.
Next, inspect the skeg for any signs of being bent or damaged. If there are any issues, use a file to correct minor imperfections.
After inspecting the skeg, take the boat for a test run to see if the repaired skeg performs as expected. While testing, pay attention to any unusual vibrations or noises, as these could indicate that the skeg isn’t fixed correctly.
If everything seems to be in order, consider painting the repaired area to prevent rust and corrosion.
Frequently Asked Questions
Can a broken skeg be repaired?
Yes, a broken skeg can indeed be repaired, and the approach to its repair largely depends on the extent and type of damage it has sustained, as well as the effort one is willing to invest in the repair process. The most common methods for repairing a skeg involve either some form of welding or the use of a bolt-on skeg repair kit.
Welding can be used for more significant damage, requiring professional skills or proficiency in welding techniques. On the other hand, bolt-on skeg repair kits offer a more accessible option for those looking for a DIY solution, without the need for welding or professional assistance. These kits can effectively restore the skeg’s functionality, protecting the lower unit of the boat and improving its steering and stability.
Does a broken skeg affect performance?
A broken skeg on a boat can indeed have a significant impact on the vessel’s performance. The skeg, which is part of the outboard or sterndrive gear case, plays a crucial role in providing directional stability and ease of steering. When it is damaged or broken, possibly due to running aground or other mishaps, the boat’s handling can be adversely affected.
This can manifest in issues such as ineffective steering, reduced directional stability, and potentially more rough and unstable operation, especially when opening the throttle. Repairing a damaged skeg is essential to restore the boat’s performance and ensure safe and efficient operation.
How much does it cost to fix a skeg?
The cost to fix a skeg on a boat can vary widely depending on the extent of the damage and the chosen method of repair. For minor damages, some repairs can be as low as $50 to $100, especially if it’s a simple weld and paint job that can be done without removing the boat from the water. However, for more significant damage that requires professional attention, the costs can range from approximately $250 to $350. This price range typically includes welding and painting but can increase if the gearbox needs to be stripped due to the heat involved in the repair process.
In cases where a full repair is necessary, including weldable repairs and cavitation plate repair, costs start at around $300 and can go up to $400 or more. It’s important to note that these prices can fluctuate based on the repair shop’s location, the specific requirements of the repair, and any additional services that may be needed.
Can you run a boat without a skeg?
It is indeed possible to operate a boat without a skeg, although this is not ideal for all types of vessels. The skeg, which is a fin-like structure located on the lower part of the boat’s hull or the lower unit of an outboard or sterndrive, plays a crucial role in providing directional stability and protecting the propeller.
While many boats, especially those with outboard motors, stern drives, or inboard outboards, can technically function without a skeg, its absence can lead to steering issues and reduced control. The skeg helps to minimize steering torque and aids in maintaining a straight course, especially at higher speeds. Therefore, while a boat can run without a skeg, doing so may compromise its handling and safety, particularly in challenging conditions.
Conclusion
Now that you’ve repaired the skeg on your boat, picture yourself gliding effortlessly through the water, feeling the smooth motion beneath you.
With the right tools and materials, you can conquer any damage that comes your way. And we can help with the most items you need – all you have to do is contact us.
So next time you hit the waves, trust in your skills and enjoy the ride without worry.
cta_section
